Monday, 31 October 2016

Draft work for Pre-Lim

Adding the image.
Adding the text.
Creating my final image.
Whilst learning the different tools on photoshop i chose this image and added it to photoshop using 'Ctrl' and dragged the image down to resize it and recreate the image onto my background image, to make sure i know what tools I can use when creating my final image.

Friday, 21 October 2016

Applying my image.

Applying my image to my front cover.

I am going to move the image onto the blank cover.

I am going to resize the image and correct the placement. Then remove the rest of the background that wasn't removed by the 'Magic tool'.

Removing the background of my image.


  In order to remove the background of my image I needed to click 'Layer' where I can remove the background without effecting the original image.


From layer I will click on 'New' and then 'Layer from background' to ensure the background removes without issues of changing the original image.


Im going to select the 'Magic wand' tool and remove most of the background.


Overall, I have removed the background.

Monday, 17 October 2016

Adding my image to photoshop


 I am adding my image to photoshop where I will take out the background and add it to my magazine front cover.

First I have gone to 'File' in order to get my drop down menu.


Then from in the drop down menu I will select 'open' and find my image.


Once I have added my image I will select 'Window' and 'Float in all windows' in order to create a full view of both my magazine and my background image.


Making my magazine.


  To start my magazine front cover I made sure that my front cover was the right size and was suitable for all the information I needed to put onto it.


Making sure that my 'Present' was set to 'International paper' in order to get the correct dimensions.

My blank magazine cover is now ready to be created into my final magazine.


Friday, 14 October 2016

my final shot

The final shot I have chosen for my Pre-lim task is this photo of my actor:

I have chosen this image as it displays the way in which our school is welcoming towards young pupils and helps them excel in their studies right through to the age of 18. This image also is clearly welcoming as my actor is displaying welcoming body language in order to show that the school is friendly and welcoming.

Wednesday, 12 October 2016

Permission of actors.


Whilst planning my actors I had to ask their permission and ensure they where comfortable with their pictures being taken.. Therefore, I asked them to take a look at this letter.       

organisation of actors

I decided to use one actor for my photograph as this will show that the school is independent and that you really have a chance to mature into a young adult within your time at the school.

I decided to use a fellow sixth former as it would demonstrate how the school helps you grow from the age of 11-18 and overall allows you to create a pathway for the future.
 I also made sure to take multiple shots of my actor whilst he was sitting in front of the white wall in order to make sure I got an accurate picture whilst correcting the lighting and making sure there is no red eye.
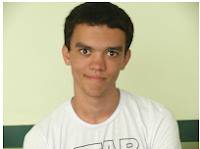
Many of the pictures I took I made sure to have my actor smiling to show the atmosphere the school has on it's students.
Also making sure that I used the rule of thirds I made sure my actors eye line was always hitting the top line of the rule of thirds giving me a more effective images.

My six pictures are slightly different however display how a second can change the way the image is therefore there is different lightnings and different angles.

Front Cover Style Model.


I have chosen these school magazines as the are shown to be school magazines and also have key features such as a house style that I would like to use in my front cover.


Friday, 7 October 2016

Orgaisation of resources.

In order to create the best image without it being rushed I have decided to use a camera at period 6 on Wednesday 12th October 2016. The camera I will be using for my image is a DLSR camera in order to get the best image, to which I will apply the rule of thirds to.

I have decided to recreate my image at this time as the school will be relatively empty and allow me to take the image at this time in a quite are with no distractions and no alter to the lighting.

Front Cover Planning: Lighting

Lighting:


  The lighting inside the music room may be very dark as there is no windows or very many lights. Therefore, it may be difficult to get a photograph with good lighting that will have the shadows and highlights I will need to create a good image. Therefore, I may need to take multiple images to ensure that I get a good image with good lighting.
  
  On the other hand, I may need to change location to ensure that I have good lighting throughout the image to ensure that it becomes a good image and easily portrays the story behind my image
here

  Once I had changed my location, I found better lighting as there was no windows. Therefore, my lighting was not mixed with natural lighting, allowing me to adjust my camera setting and develop my shots to stop red-eye reflections.

Wednesday, 5 October 2016

Finding a location

For my location I decided to use the upper sixth form corridor in Oldershaw.

I decided to take my shot at this table. I decided to use this table as the background of this image as the wall does not persist of multiple colors and is mostly a consistent color. This in turn will make it easier to remove the background in Photoshop at a later date.


Even though I am going to be removing the background for my final image the background I have used gives a good contrast between the wall and my model overall allowing me to easily distinguish between the two.

This location is also very open allowing me to have better lighting to create my image and show the brightness and the happiness of the school on my front cover. Overall, telling a story with the location.

Medium close up examples.

In my pre-lim magazine task I will use a medium close up in order to present my model on my front page.